Friday, October 17, 2014

Shipments At The Bamboo Lagoon

Well our shipments have finally come and the house is chock full. We got the last of the moulding installed the day before the first one showed up. We went from mostly empty to pretty darn full.

These first ones are only the first shipment, which was the stuff that had been in storage for 7 years while we were living out of the country. A lot of this stuff is getting purged.

Pile in weight room

Tons of book boxes taking up part of the living room

Dishpacks and book cases in the lving room/diningroom

Just one wall in the project room

The space I am living in until the unpacking is done

Our once empty laundry room
Then three days later (after working 2 10 hour shifts, so no unpacking was done) the second shipment arrived...basically a second half weight-wise. This was the stuff we took overseas with us and is the day to day stuff for the most part.

Weight room with even more stuff

Stacked in front of the first pile

Coming up the stairs to the main floor

Bedroom

Bedroom looking towards closet

Livingroom...so much stuff

Dining room...and table isn't in here yet

Kitchen with squiggle room on the sides

Backporch where some stuff will stay for a while

The nice thing about having it all here, is the ability to get rid of a bunch of stuff that we don't need or won't work with this house. Fortunately we have some great places to donate so a lot of stuff isn't going in the trash necessarily. I am not really interested in selling much of it, I would rather donate, but there are a few items that need to be researched in case they are worth more than we think. As a box gets emptied, a lot of times, it gets repurposed as a donation box for one place or another....we have ReStore, St Vincent's, BioMass, and a book exchange for the majority and then of course a good recycling center for the packing materials and boxes.

It will be quite a while before all of this stuff is unpacked and organized but hope to get the majority of it knocked out over the next few weeks. Even if some of it stays in boxes for a while, it will be organized to deal with at a later date.

Monday, October 13, 2014

Closet Fix (Finally)

Without the support on the end
This one has been on the list forever. This was broken when the water damage happened and we had to have that section of the closet replaced. Up until recently, we didn't need to hang anything in that closet so it wasn't a priority but since we have all of our stuff coming soon (like tomorrow), it was something that had to be done.

It really was quite easy...first mark where we needed the piece of wood to sit, and mark the studs in the wall. It was a piece of 1 x 4 that I used and cut to length on our chop saw.

Then predrilled two screw holes to mount the board. Once the board was mounted, then attached the plastic piece that holds the pole in place....really a pretty easy job and should have been taken care of ages ago.

Support in
Oh well, it is done now...and we probably won't end up hanging much in there since that closet is in our sports/weight room. Still needs painting but that will happen when the room gets painted.

Friday, October 10, 2014

Pre-delivery Garage Cleanup

Before cleanup and organization
We have 14,000 lbs of stuff showing up in the next few weeks and getting space in the garage is a must.

In the midst of this, we are having our floor replaced in the main section of the house, so we are really under the gun.

Dismantling the old vanity from our downstairs bathroom that we have been using as counter space in the garage is one of the big things. We can't take it to BioMass without getting all the hardware off it and removing the laminate top. There is also a big stack of wood from the kitchen and entryway tearouts that needs to be sorted.

Over the last few months the garage has been the dumping ground for a lot of the supplies we have for various projects without there really being any organization to it and that has to be dealt with.

Truck loaded up to go

Once everything that was being kept was organized and moved to one side of the garage, the stuff going to Biomass and Restore was loaded in the truck to be dropped off.

Ready for deliveries
Overall the cleanup was very satisfying and absolutely crucial to the eventual delivery of goods.

Tuesday, September 30, 2014

Brass Hardware Removal At The Bamboo Lagoon

One of the 6 old brass handles and latches
As you know, I have been on a mission....a never ending mission to get rid of all the brass accents in this house. Since we had to have to doors pulled off to do the floors, I decided this would be a good time to replace all the hinges and doorknob hardward on our 6 upper floor doors.

So we had thse ornate brass handles and latches on all 6 prehung doors. On top of that, none of them had locks, which some of the doors really needed.

I bought three regular brushed nickel door knobs, and three locking brushed nickel door knobs to cover the 6 upper floor doors.

Old brass hinges

I bought a bulk pack of brushed nickel hinges that matched the size and shape of the brass ones we already had so we wouldn't have to do too much work on the doors themselves. I also got a few brushed nickel hinge placed door stops so I could get rid of the ugly brass ones that were screwed into the floor or baseboards.

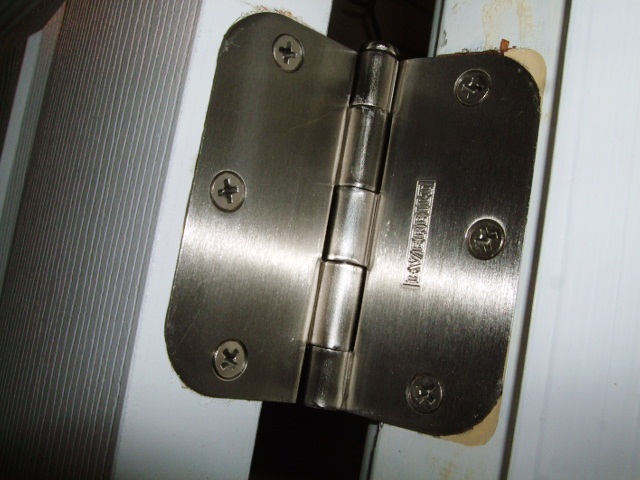
New hinge after door has been put back on

I popped the hinges on the doors with a screw driver and put them back together once they were removed from the door so we could donate them to restore. I taped the screws into holes so they wouldn't get lost.

Once I got them off, I put the new hinges onto the door frame, and then popped them open with a screwdriver to separate them and hang the second half on the door we had already taken off for the floor job. I made sure when I was doing this, that I put the matching pairs so that there wouldn't be an issue with putting the doors back on the frame.

One of the new knobs

I replaced the door knobs and latches on each door, except for one that is still not reachable in the mess. Now we have locks on our bedroom, office and bathroom doors on the upper floor. I put the pins used to unlock them along the door frames so they would be easy to access if needed.

We have the new ceiling fan and the faucets for the next brass projects and then the only thing left will be the trim around the shower doors in the master bath...whoeee!

Thursday, September 18, 2014

Cabinets In The Laundry Room

We had some really yucky shelves in the laundry room and when figuring out what to do with the floor, I realized that it was the right time to get some stock cabinets installed. It made sense to enclose the laundry stuff and also to get them in before the washer and dryer were delivered.

Here is a shot of what the shelves looked like with all our stuff piled on them. Kind of a mess I am sure you will agree. If you read my post about the removal of the shelves and the work it created in the attic and roof, you will know why I put this one off for a while.

So first thing was to remove the gigantic screws that were holding the brackets in. This of course caused the issues with the dryer vent, but wasn't going to stop me.

Once the shelves were out, this is what the wall looked like.

Bald wall with washer faucets and GFCI

New cabinets on floor

After I leveled and installed ledger bar

With cousin help, cabinets mounted on wall

After I put the doors back on

And this is the final look, which is so much better than those open shelves. They are just basic stock shelves meant for a kitchen but they do the job and will hold up longer than the particle board options the "storage section" had as an alternative.

Right now, these cupboards are filled to the brim with odds and ends from not only the laundry room but all over the house while we get the bamboo floors installed, but that is another project for another post!

Monday, September 8, 2014

Attic Projects At The Bamboo Lagoon

There have been a couple of little projects involving the attic in this house on the list for some time. They weren't super intensive projects or anything but just something that needed to be done that hadn't been done.

So in the process of working on another bigger project yesterday, I kind of got forced to deal with one of them and since I was already dealing with one, it made sense to just knockout the other ones.

Dryer Vent Project

The dryer vent in this house goes up and out thru the attic. It has to be this way because of the way that the laundry room and our master bath nest up against each other. I found that the vent wasn't connected to the vent in the roof of the house so for a period of time, renters were venting into the attic space rather than out through the roof vent.

I had to put the vent piece up as high as it could go and originally, I figured I would get in the attic and just fix it there, but the space was way too tight so I ended up getting on the roof and fixing it from there.

Attic view where vent wasn't going through roof of house

Covered attic vent

Before screen and cleanout of lint
 I also cleaned the roof vent out of built up lint and put a new screen on it that can be removed and cleaned periodically since it is only clamped down.

With new bracket attached to keep it from falling into attic

With new screening and clamp attached

Electric Box Cover Project

The lighting in the laundry room used to be a standard overhead light, and at some point in time was changed over to be a florescent tube lighting fixture. When the electric box that previously fed the original light was covered, it was done so poorly. It didn't completely cover the hole in the drywall and it was crooked.

I had purchased a new paintable cover for it, but just hadn't gotten to it because I had to access the attic to push the electric box down flush with the drywall to attach it. Since I was already doing things in the attic, it seems logical to knock this small one out.

Hole and electric box in laundry room ceiling
The cover I bought for it
In place and it can be painted to match when ceiling is painted soon

Attic Access Cover Insulation

The piece of drywall that covers the access to the attic apparently had two bath towels stapled to it to provide insulation. Definitely not adequate. We had some left over insulation from the wall repair (and even though it isn't the same R factor you would use in an attic) and figured it would be a good option. I cut the piece to fit and then stapled it to the attic side of the drywall.


Drywall piece with no insulation

Extra piece of insulation

Finished project, better than it was for sure!

Miscellaneous Attic Checkups

As well as these three little projects, I also had plans to check the insulation in the attic to see if it was adequate (and it was), check the exhaust vents to see if they vented outside (and they do), and check if putting in a pulldown ladder and plywood for storage up there was feasible (and it really isn't). So all in all, even though I didn't get a lot of the other project done, at least that attic stuff is off the list!!

Saturday, August 30, 2014

New Vanity Light

One more step in the brass removal project was to get rid of the vanity in our master bath. Its only redeeming quality was that it wasn't ALL brass, but only partially brass...lol.

Old half brass vanity

One coat of Kilz

I took the old vanity light out pretty easily, but found under it that the horrible kelly green paint that the renters used in that bathroom was going to show when the new vanity was up due to the fact that the vanity wasn't removed when the room was repainted.

Last coat of Kilz

Two coats of the new color

So I had to apply two coats of Kilz to cover up the green and then had to paint that portion of the wall the new color that the bathroom will eventually be. It took two coats and a few touch ups but the portion above the mirror is now "new".

New light without the globe attached

With the globes and the light on

Once the painting was done, the install of the new vanity was pretty easy. Definitely like the new look over the old.

Monday, August 4, 2014

Front Porch Light Replacement

Okay, I bought all four porch lights at the same time, but due to weather and time constraints they weren't installed at the same time. I was able to work on two of them first because they are on the back of the house and in the shade for a large portion of the day.

Old front porch light (nice light in good condition just not the right style)

Old ugly brassy original light next to garage door

So this afternoon, in spite of the heat, I decided it was time to get the front porch ones done. The front door light had a pancake electric box on but also this built up ornamental piece that will eventually need to be removed to provide a more flush mounting so that weather won't get in. I need to run a bead of clear caulk over all four lights now, even though only the front door one seems that it would get any weather on it.

New porch light on front porch

New porch light next to garage door

Both installed pretty quickly and seem to be working okay. Currently they have incandescent bulbs in them since they are both motion sensored dimming lights, but I am going to hit a DIY store tomorrow and see if I can get dimmable LED lights for them so they can be left on all the time. They have light sensors so they only turn on at night.

So glad to have this project off the list!!