In the course of replacing all outlets, switches and faceplates in the entire house, I was always glad that I didn't have to mess with the kitchen. It was remodeled in 2002 and the outlets, switches, and faceplates in there were all replaced with new white. The faceplates are bit smaller but since they are contained to the kitchen, I am not worried about it.
Today, I was going through all the outside faceplates and adding insulation to them to help keep the house energy efficient and found that the undercounter lights, and the switches, outlets and faceplates are all kind of grungey...so in the "easily distracted" phase I am in, I decided to tackle cleaning all of that as well. Figured since I was already taking half of them off to insulate them, it was easy enough to clean them up as well.
So while adding insulation to 1 outlet, and 5 switches, I also cleaned 3 undercounter light covers, 4 outlets, 8 switches and all the associated faceplates. It is amazing how much better they all look.
Thursday, January 31, 2013
Tuesday, January 29, 2013
Just Two Things Today
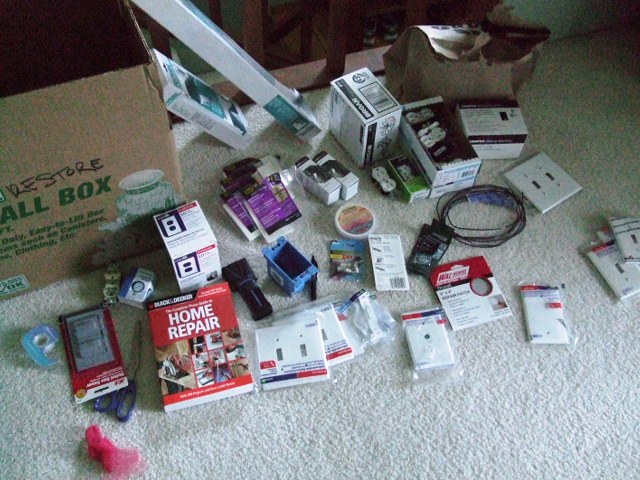 |
| Just one small pile of supplies... |
Discovered once again, crap from the renters that just makes me mutter under my breath....grrr. Underneath one of the bedroom windows, there is a long trail of wax on the wall...someone was burning a candle and wasn't careful, and then didn't freaking clean it up...how hard is that?
Then I had to remove several nails that, instead of being taken out by the renters when they moved, or even fixed by the property management when they came through, were pounded into the wall. Jackasses!!
At some point, those rooms are getting painted and I figured while I was down there, I might as well prep things...LOL. Screens on both windows and blinds on both windows need to be replaced too, but that is a task for another day and another budget. Ideally, we would love to replace all the windows in the house but I think we would have to win the lottery for that...haha.
Sunday, January 27, 2013
Three And A Half Hours In The Yard
Yard day was coming up and that meant getting out into the yard and filling up the bin for Monday's collection. Little did I know I would be filling the equivalent of the yardwaste bin twice.
The right side of the yard still had a ton of oak leaves that I just hadn't gotten a chance to get to. I think that some of these leaves had been there for years. We have steps that go up the right side of the backyard that allows access to the terraced area behind the pool but when I started out, you would not even know that there were stairs there.
Of course once I got up to the top, I realized that I needed to do some pruning on a large juniper we have near one end of the pool so that we could keep overhang into the pool area to a minimum and allow access to cleaning up leaves along the backside of the pool deck.
Because of the incline, it is impossible to bring the actual yardwaste bin up, so I opted to fill up a smaller 32 gallon trashcan over and over and just bringing it down and dumping it into the big bin. At the end of the day, I had filled the smaller can at least 8 times (I think I lost count). I filled the yardwaste bin to the very top and then had 3 more trashcans filled with more yardwaste that would have to wait until after the pickup on Monday.
As soon as the pickup was over, I dumped the other trashcans into the yardwaste bin basically filling it to the top again.
Next is starting to prune back some of the stuff in the backyard before the growing season starts so we can get some new plants in to replace the ones the renters killed from lack of watering.
 | |
| Steps (Before) |
The right side of the yard still had a ton of oak leaves that I just hadn't gotten a chance to get to. I think that some of these leaves had been there for years. We have steps that go up the right side of the backyard that allows access to the terraced area behind the pool but when I started out, you would not even know that there were stairs there.
 |
| Steps (After) |
 |
| End of Pool Deck (Before) |
 |
| End of Pool Deck (After) |
 |
| Juniper and Path (Before) |
Of course once I got up to the top, I realized that I needed to do some pruning on a large juniper we have near one end of the pool so that we could keep overhang into the pool area to a minimum and allow access to cleaning up leaves along the backside of the pool deck.
 |
| Juniper and Path (After) |
 |
| Top of Stair Area (After) |
Because of the incline, it is impossible to bring the actual yardwaste bin up, so I opted to fill up a smaller 32 gallon trashcan over and over and just bringing it down and dumping it into the big bin. At the end of the day, I had filled the smaller can at least 8 times (I think I lost count). I filled the yardwaste bin to the very top and then had 3 more trashcans filled with more yardwaste that would have to wait until after the pickup on Monday.
 |
| Bottom of Steps (After) |
As soon as the pickup was over, I dumped the other trashcans into the yardwaste bin basically filling it to the top again.
Next is starting to prune back some of the stuff in the backyard before the growing season starts so we can get some new plants in to replace the ones the renters killed from lack of watering.
Thursday, January 24, 2013
Exhaust Fan Motor Replacement
 |
| Old fan in ceiling |
The one that doesn't have attic access is the one in the downstairs bathroom and I would have to say the loudest of the bunch which is the main reason it needed to be changed out. I figured out how to remove the motor and fan plate and then started my quest to find a new motor and fan so that I wouldn't have to replace the entire housing (which would mean cutting, patching and re-texturing drywall).
 |
| Housing after motor plate is out |
 |
| Old motor and fan removed from plate |
 |
| New motor and fan on cleaned up plate |
 |
| New motor and fan with plate installed in housing |
I am in the process of painting the cover (since finding a new cover that fits is not as easy as finding the motor and fan was), so I'll have to take another picture once the cover is back on.
Carpet Pad At The Bamboo Lagoon
Okay, so one of the things that was ruined in the water damage last year, was the carpet pad in the small bedroom closet downstairs. I went to a local flooring company to find out how much it would be to get a small piece of carpet pad and since the amount I needed was so small, they just gave me a 4x6ft piece which was way more than enough. I was so grateful.
So here are the pics from the repair work. This first one is from after the insulation, drywall and texture had all been replaced but the carpet is still pulled back from when the pad was removed and the walls aren't painted.

This next pic is from after I got the pad cut and put in but still hadn't put the carpet back over.

Last pic is after the carpet was put back in. Note that this is all a temporary thing anyhow because at some point, we'll have different flooring down here, but this was a way to get the functionality of the closet back for now.

Would love to replace those closet doors too, and soon we will be painting the closet when we paint the rest of the room.
Wednesday, January 23, 2013
Today, Just One Thing At The Bamboo Lagoon


I found these cool boxes at the DIY, with the help of a lovely employee, that are made just for this kind of application. You do not need to have a stud to tie into, and you don't have to make a huge hole in your wall and then patch it. You just cut a hole the same size as the box and then use the built in clamps to secure the box to the drywall itself.


Here is the final result...minus the new paint we'll someday have.
Wednesday, January 16, 2013
Electric Again and Forever

So the downstairs was just a matter of putting in a new GFCI, so that went pretty fast and it turns out that it is in the middle of the circuit so I was able to mark the other outlet in the bathroom as GFCI protected...yeah! I put in insulation to the covers that are on outside walls.
The laundry room just needed covers for all the work and then a three way switch replaced, and two single pole switches replaced. It should have been no big deal but just like the 4 way circuit I had to do earlier this year, this three way wasn't wired correctly either, and it only took 45 mins and 8000 different combinations of wires before I figured out the right one. Once it was done, it was easy peasy, of course.
Today, while out and about, I stopped at another DIY and think I have found the motor for the exhaust fan mentioned in the last post, so that might be fixed quicker and easier than thought. And that would be a huge relief!
Sunday, January 13, 2013
Knocking Electric Out At The Bamboo Lagoon
Managed to change out 4 plugs and 3 switches today in the laundry room and downstairs bathroom. Changed one of the plugs in the laundry room to GFCI since it is less than a foot from the faucets for the washer. I need to buy another GFCI to replace one down in the bathroom.
I couldn't find the circuit breaker for the switches (only the plugs) in the laundry room. It is probably on the livingroom circuit, but I was watching football while working on this task and I didn't want to miss the game. So I will figure it out when I start to work on the plugs in livingroom. Tomorrow has a trip to Home Depot on the To Do list to pick up more of the electrical supplies I need for the next phase of replacement.
I also dismantled the first of several ceiling exhaust fans that need to be fixed or replaced. I will take this first one with me tomorrow to see if I can get another that fits into its same bracket or a motor to replace the one it has. I don't want a fire to start because of these thirty year old exhaust fans, that is for sure.
The tricky thing about this one is that it is in the downstairs bathroom ceiling, which doesn't have attic access. So if I have to take out the bracket to put in a completely new one in, it means cutting the sheetrock and fixing the sheetrock and retexturing the patch, which is something I would like to avoid if possible.
Wednesday, January 9, 2013
Bird List Update

Varied Thrush
Tuesday, January 8, 2013
Winter Robin
 This guy showed up this morning on the blue spruce out front and just sat there for a long time. Long enough for me to get several shots. You can see his colors are muted right now but he is still beautiful.
Wednesday, January 2, 2013
Fire At The Bamboo Lagoon

Turns out that while we have glass doors on the fireplace, you really shouldn't keep them closed when burning a fire because they aren't made with fire tolerant glass. They give the impression of being "woodstove-like" but the chimney sweep said they could shatter from the heat if they were to be completely closed. There is a built in screen door though, that latches so that is kind of nice. They said the chimney looked good inside (no masonry though, just a metal pipe chimney), and was actually pretty clean. They vacuumed up all the ash. There are also cement blocks (not fire bricks) sitting in the bottom of the fireplace. They basically lift the grate up higher but they are not needed and could be removed if we wanted.
This fireplace doesn't have a blower on it, and the chimney itself actually butts out from the house which basically means the fireplace is for looks and produces very little heat for the house. Obviously, if we had no power, it is an option for keeping warm, but it is not an efficient option so I have no plans to burn wood in it regularly, but a nice little log once in a while is always fun.
There was a real wood log left in the fireplace by one of the renters so I put that on top of the Duralog and got a bit of cackle and good fire smell as well as a bit of a longer burn. It was nice and warm to sit in front of it too!
Subscribe to:
Posts (Atom)