Showing posts with label Decor. Show all posts

Monday, March 12, 2018

List Needed

So I was telling my sister today about how there are a lot of projects to do around here, and part of what makes me feel like I am making headway is to get all the supplies for those projects even when I can't start those projects just yet...it is a false sense of accomplishment when nothing is really being done.

In the course of this, I have a lot of supplies and several half accomplished projects (along with many unstarted projects) and thought I better make a list. This is just a list of the ones I have already got supplies for, not all projects which need to be done around here (which would make for a very big post).

Update: as I remember items, I have been adding them to the list, and as I have been finishing things off, I am striking them out. Having this list is actually a really good thing for me...not sure why I didn't do it before.
  • Replacing all four porch lights Aug 4
  • Fixing 220 outlet in laundry room Jan 10
  • Setting up remote garage door opener Apr 13
  • Create new screens (frames and all) for downstairs bedrooms June 7
  • Set up weight room July 21
  • Weedblock bed
  • Reinstalled downstairs blinds July 21
  • Put table together July 21
  • Fixing redwood bench on pool deck
  • Check insulation situation in attic Sept 7
  • Changing lock on downstairs closet door Sept 20
  • Painting white lattice under pool deck
  • Painting all bedrooms, bathrooms, hallways and the laundry room
  • Fixing electrical outlet on pool deck March 25
  • Fixing electrical in garage October 25
  • Fixing electrical in house March 25
  • Replacing lights in two bedrooms January 3
  • Replacing exhaust fan in office with light
  • Mulching beds March 30
  • Replacing porch August 30
  • Changing curtain rods in livingroom March 21
  • Planting items in yard
  • Getting rid of gophers
  • Redoing side beds and border
  • Removing dead stuff from yard
  • Removing overgrown stuff from yard
  • Cleaning grout in kitchen
  • Fixing grout along kitchen backsplash
  • Reseeding grass
  • Fixing fence on right side of house Apr 13
  • Fixing fence on right side of house 
  • Fixing closet in bedroom  Oct 13
  • Patching and retexturing holes in walls
  • Sanding and staining railing
  • Sanding and staining window seat
  • Pruning plants in backyard
  • Touching up exterior paint
  • Caulking kitchen sink and around faucets in tub July 22
  • Cleaning and painting table for pool deck
  • Labeling all plants in yard
  • Painting exhaust fan covers, doorbell cover and intake vent covers July 22
  • Replacing towel racks and toilet paper dispensers in both bathrooms March 23
  • Prepping and painting all stained doors and trim white
  • Installing CO2/smoke alarm downstairs April 24
  • Change filters on heating/cooling system July 15
  • Change out electrical 220 in garage
  • Tiling laundry room
  • Tiling mbath
  • Tiling downstairs bath
  • Installing vanity
  • Installing Magic Mesh March 12
  • Install new vanity lights in mbath August 24
  • Install new vanity lights in downstairs bath
  • Replacing sand filter and multi-port value June 23
  • Install storage for extension ladder April 13
  • New herbs June 15
  • New plants in pots June 15
  • Fix rock wall near pumphouse
  • Fix support in weight room closet Oct 13
  • Fix rock wall in guest parking area
  • Create manual sprinklers for side yard
  • Create manual sprinklers for lower back yard
  • Work on pool deck boards
  • Install reducers on the drip lines
  • Installing new mirrors
  • Moving old mirror from mbath Sept 20
  • Fix electric box cover in laundry room Sept 7
  • Insulate attic opening cover Sept 7
  • Secured dryer vent Sept 7
  • Fix hole from woodpecker Sept 20
  • Install new cabinets in laundry room Sept 20
  • Unpacking 12000+ lbs of household goods  March 10
  • Installing bamboo floors on main floor of house  Oct 13
  • Install ceiling fan
  • Caulking and filling all baseboards on main floor  Mar 11
  • Filling floor in kitchen Jun 9
  • Patching pool  Feb 20
  • Replacing pool liner July 16
  • Powerwash patio furniture
  • Powerwash driveway
  • Fixing drain in bathtub  Nov 20
  • Putting new trim pieces on faucets
  • Fix porch stairs
  • Fix sprinkler problems
  • Fixing fence posts on left side of house
  • Demo cabinet in garage Mar 25
  • Replace shower door May 3
  • Patch and paint touch up on stair walls May 4
These are all the ones I can think of off the top of my head, and as you can see, I have plenty to keep me busy without needing to go get any more supplies any time soon...whew, that makes me tired...LOL

Wednesday, May 3, 2017

Less Brass

Finished
While the brass shower door in the master bath has been something I wanted to replace for ages, I have held off because it was merely a cosmetic issue and not a need.

Lately however, the door has started to not work as it should and not be connected to the stall correctly. This has made the choice to replace it more of a need and less of a cosmetic issue.

This door is one of four things left in this house that are brass, and I am thrilled to be rid of it. The new door makes the shower look so updated even though the stall itself is original to the house. The lines and color really just update it so much and I am so pleased.

Unfortunately because of the unique shape of my shower stall, this wasn't something I could just order and replace myself, I needed to to have it done. I got an estimate last week and then the door was custom created and the install was today.

Before
I have to wait forty eight hours before I can use it so that the silicone has a chance to dry, so I pulled the necessities out so I could shower in the guest bath downstairs for the next two days.

Next week we start on the fixing of the front porch!

Friday, October 14, 2016

Unpacking at the Bamboo Lagoon

After organizing
So, we had two big shipments of our stuff...the stuff that was in long term storage was packed in 2007 and mostly contained stuff that we would not need living overseas...the second shipment was the items that we did take with us but still sat in storage for a period of time.

Most of our yard stuff did not make the trip because we didn't know what kind of housing we would end up with and we were limited on weight so anything too heavy and not absolutely necessary did not make the cut.

These four big boxes along with all the stuff that is sitting around them was stuff that didn't make the cut and still didn't have a home in our yard quite yet so I was content to leave it packed up.

Before starting...trashcans, tarps, coolers, and boxes

This week, we had a big storm coming our way, and I needed to get the gutter in the back of the house cleaned out. This gutter is actually under the covered area of the back porch so it can't be accessed from the roof and has to be cleaned out using a ladder on the back porch. I couldn't get to that section due to these boxes and extra stuff, so I was motivated to tackle the boxes.

Midway through gutter and cleanup

While doing this, I found a little hidey-hole that a neighborhood rodent has been using...lots of droppings and half eaten acorns, but that little spot no longer exists. Found a half eaten ant trap too...didn't realize those were a delicacy.

Nasty little hidey-hole

It took me a while to get it all unpacked and ended up finding a few surprises (the movers always put a few things in the boxes that don't really make sense), but for the most part, it was all yard stuff.

Some of the yard art will go up on the walls of the house rather quickly (once the storm has passed), but the number of pots we have is pretty immense and most of that was stacked back up near the house in prep for the storm and will be sorted out later.

So while it doesn't look like a lot of accomplished as far as moving things out, in reality it was....everything is cleaned up, organized, and accounted for.

Tuesday, January 26, 2016

Furniture Rearrange at the Bamboo Lagoon

I know it has been a while. I have kind of stalled out on projects. Not that there aren't tons to be done, but just that with working full time, I find that I am limited on time.

The way that this corner of our living room was set up (even though it wasn't completely set up) has been bugging me for a while, but I haven't had the time or inclination to do anything about it. Well, the other day, this changed...I decided it was time to just try it out. It gave me the opportunity to get some cleaning done in the same part of the room.

So here it is.


This is the before picture. I had the love seat kind of up against the wall, with the step tansu against the stair railing but set up as a buffet and not in the step configuration. I didn't like how the love seat bled over in front of the window and how I couldn't put it all the way up against the wall because of the task light and the heater vent.

So this is now it looks now...


I put the step tansu in the corner set up in the step configuration and added some art to the wall. I moved the love seat in front of the step railing. I think it flows a lot better and makes the whole area more functional. I guess someday I'll be done with the rest of the house...of course this will probably be ten minutes before we sell it...lol.

Tuesday, June 9, 2015

Final Touches

Before filling
So this last little bit of filling in the kitchen was final touches to the floor itself. I still have some wall touch ups to do on the stairs but this was the last for the floor itself.

The filler I am using is the stuff my friend, who installed the floors, recommended. It is in the honey oak color, even though our floors are "toast" bamboo. It covers pretty well as you can see from the second shot, you can barely tell where the nail holes are.

Apparently, this stuff hardens like wood too so no worries about it flaking apart later. We used it on all the nail spots and then in a couple of gaps that we found after the floor was nailed down.

After the fill

Wednesday, March 11, 2015

Last Corner Of Baseboards

Pretty proud of myself for knocking this out...now I can put all the furniture where it needs to go without feeling like I need to get behind it all to finish this up.

Before

Before

After

After


Furniture back in its basic location...still need wall decor and rugs but it is coming together slowly...

Tuesday, September 30, 2014

Brass Hardware Removal At The Bamboo Lagoon

One of the 6 old brass handles and latches
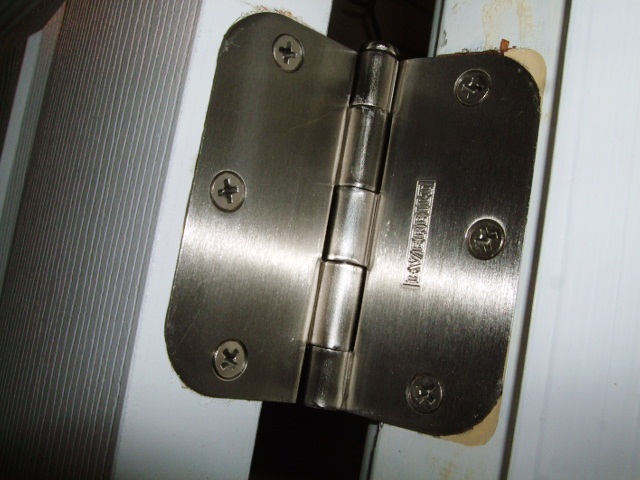
As you know, I have been on a mission....a never ending mission to get rid of all the brass accents in this house. Since we had to have to doors pulled off to do the floors, I decided this would be a good time to replace all the hinges and doorknob hardward on our 6 upper floor doors.

So we had thse ornate brass handles and latches on all 6 prehung doors. On top of that, none of them had locks, which some of the doors really needed.

I bought three regular brushed nickel door knobs, and three locking brushed nickel door knobs to cover the 6 upper floor doors.

Old brass hinges

I bought a bulk pack of brushed nickel hinges that matched the size and shape of the brass ones we already had so we wouldn't have to do too much work on the doors themselves. I also got a few brushed nickel hinge placed door stops so I could get rid of the ugly brass ones that were screwed into the floor or baseboards.

New hinge after door has been put back on

I popped the hinges on the doors with a screw driver and put them back together once they were removed from the door so we could donate them to restore. I taped the screws into holes so they wouldn't get lost.

Once I got them off, I put the new hinges onto the door frame, and then popped them open with a screwdriver to separate them and hang the second half on the door we had already taken off for the floor job. I made sure when I was doing this, that I put the matching pairs so that there wouldn't be an issue with putting the doors back on the frame.

One of the new knobs

I replaced the door knobs and latches on each door, except for one that is still not reachable in the mess. Now we have locks on our bedroom, office and bathroom doors on the upper floor. I put the pins used to unlock them along the door frames so they would be easy to access if needed.

We have the new ceiling fan and the faucets for the next brass projects and then the only thing left will be the trim around the shower doors in the master bath...whoeee!

Thursday, September 18, 2014

Cabinets In The Laundry Room

We had some really yucky shelves in the laundry room and when figuring out what to do with the floor, I realized that it was the right time to get some stock cabinets installed. It made sense to enclose the laundry stuff and also to get them in before the washer and dryer were delivered.

Here is a shot of what the shelves looked like with all our stuff piled on them. Kind of a mess I am sure you will agree. If you read my post about the removal of the shelves and the work it created in the attic and roof, you will know why I put this one off for a while.

So first thing was to remove the gigantic screws that were holding the brackets in. This of course caused the issues with the dryer vent, but wasn't going to stop me.

Once the shelves were out, this is what the wall looked like.

Bald wall with washer faucets and GFCI

New cabinets on floor

After I leveled and installed ledger bar

With cousin help, cabinets mounted on wall

After I put the doors back on

And this is the final look, which is so much better than those open shelves. They are just basic stock shelves meant for a kitchen but they do the job and will hold up longer than the particle board options the "storage section" had as an alternative.

Right now, these cupboards are filled to the brim with odds and ends from not only the laundry room but all over the house while we get the bamboo floors installed, but that is another project for another post!

Saturday, August 30, 2014

New Vanity Light

One more step in the brass removal project was to get rid of the vanity in our master bath. Its only redeeming quality was that it wasn't ALL brass, but only partially brass...lol.

Old half brass vanity

One coat of Kilz

I took the old vanity light out pretty easily, but found under it that the horrible kelly green paint that the renters used in that bathroom was going to show when the new vanity was up due to the fact that the vanity wasn't removed when the room was repainted.

Last coat of Kilz

Two coats of the new color

So I had to apply two coats of Kilz to cover up the green and then had to paint that portion of the wall the new color that the bathroom will eventually be. It took two coats and a few touch ups but the portion above the mirror is now "new".

New light without the globe attached

With the globes and the light on

Once the painting was done, the install of the new vanity was pretty easy. Definitely like the new look over the old.

Monday, August 4, 2014

Front Porch Light Replacement

Okay, I bought all four porch lights at the same time, but due to weather and time constraints they weren't installed at the same time. I was able to work on two of them first because they are on the back of the house and in the shade for a large portion of the day.

Old front porch light (nice light in good condition just not the right style)

Old ugly brassy original light next to garage door

So this afternoon, in spite of the heat, I decided it was time to get the front porch ones done. The front door light had a pancake electric box on but also this built up ornamental piece that will eventually need to be removed to provide a more flush mounting so that weather won't get in. I need to run a bead of clear caulk over all four lights now, even though only the front door one seems that it would get any weather on it.

New porch light on front porch

New porch light next to garage door

Both installed pretty quickly and seem to be working okay. Currently they have incandescent bulbs in them since they are both motion sensored dimming lights, but I am going to hit a DIY store tomorrow and see if I can get dimmable LED lights for them so they can be left on all the time. They have light sensors so they only turn on at night.

So glad to have this project off the list!!

Saturday, July 26, 2014

Back Porch Light Replacement

So this house has 4 porch lights, and each one is different. Two of them were the brassy 80's style. We have wanted to replace them since we bought this house.

Last week, I finally got the replacements purchased. I managed to get the two on our back porch done in the morning on one of my days off, since it was shady on that side of the house. We have had very hot weather here for a couple of weeks now so any outdoor improvements have to be done in the shade or during the cooler times of day.

This was the one near our back slider

This was the one next to the back door
The actual change out wasn't that difficult. Both of these did not have electrical boxes for them, so that is something that probably needs to be dealt with at some point. I mostly just wanted to get them installed. Neither one is really exposed to weather directly so I am not too worried, but putting them into junction boxes is something that needs to be done eventually.

These are the two new back ones after installation. I was trying to find something with a simple Asian look to them...mostly, I end up looking at Mission and Craftsman style stuff to get the simple lines. The front ones will be a bit different because those need to be bigger fixtures and the ones they had to match these ones were gigantic so I went with a different style in a motion light.

New one next to back slider

New one next to back door
I think they look pretty cool and are definitely better than what we had up there. The old fixtures will go to the ReStore since they are still usable. Nice to see more brass leaving this house!

Monday, March 24, 2014

Rock Work At The Bamboo Lagoon

Washed out section
So I was cleaning up this walkway area in the backyard that runs up the side fence to the area behind the pool. We still had a ton of acorns and oak leaves left there and I was determined to get them in the bin for pickup. Anyhow, during the course of the cleanup, I noticed that there was a section of the rock wall bordering one of the beds that looked like it had basically slid down. I was able to dig up three or four big rocks but it wasn't really enough to fill in the gap and I knew we were going to have to get more rock to build it back up properly.

Section dug out for rock replacement
So I cut with a shovel a straight line down from the bed so that I would have a basic area for placing the new rocks in and then the next day, I took a few sample rocks with me to the big landscaping store and searched and loaded rocks for an hour or so. Once the truck was loaded up, we had 750 lbs of new rocks in the bed.

Some of the larger ledger pieces in front, and the topper pieces in back
I got back to the house and it was and hour and 1/2 of unloading and carrying the rocks uphill into our backyard. I took the tailgate off the truck which made it much easier on the body for sure. Once they were all in the backyard, I dug out the area a bit more since the rocks were a bit wider than originally planned for.

Some of the other large pieces waiting for placement.

Base layer in place
I started putting down the somewhat narrower ones first since the slope of the bed was going to allow for the wider ones on top. I back-filled behind the rocks as I got them in place.

Second level in place
Then I started working on getting the second third layers in which some overlap onto the other two ends of the repair so it would blend some.

The finished repaired section with the cap pieces on
I then put the flatter cap/topper pieces into place, and back-filled the wall and the cracks between the rocks. Some of these bigger ledger pieces were 60 lbs a piece so I don't think they will be sliding anywhere anytime soon. As you can see from the image, I have a lot of grass to weed out of the bed still but that is a task for another day...I was done for the day after getting this repair into place and the sun was done too.

Friday, January 3, 2014

Light Upgrades At The Bamboo Lagoon

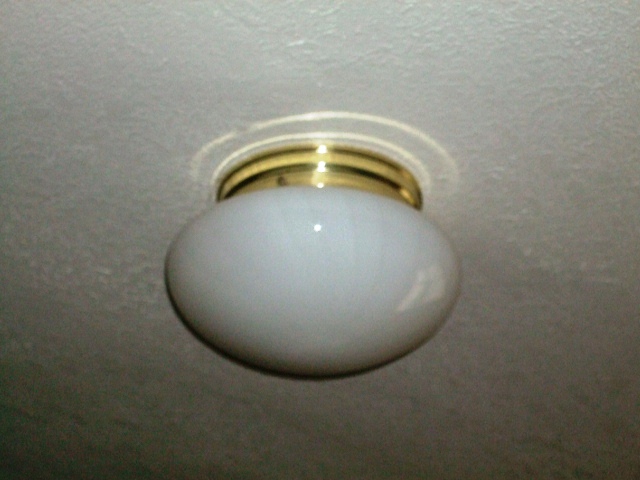
 I have been wanting to change out these light fixtures for ages. I have had the lights sitting in our garage for ages. I finally got my butt in gear. These were the lights in our two downstairs bedrooms.


So first step was to make sure the light switch was off. Brought in the painting ladder and set it up under the light. Removed the cover, and the bulb. Then loosened the screws holding the base of the light onto the ceiling.Then I pulled down the fixture so I could disconnect the wires to the light. While I had the wires exposed, I tested them to double check that there was no power to them.


I pulled the wires out of the box because the new lights needed to be grounded so I needed to find the grounds. I also found that both of the old light fixtures had insulation between them and the ceiling and I am not sure why. I connected all the new wires including the ground, pushed them up into the box and secured the new fixture base.


This light takes a self balasted CFL bulb, which I put in, and then tested the switch to make sure that everything was hooked up correctly. Then I put the cover on, and moved to the other bedroom and repeated the process.


Final look. I didn't want a light with the button in the middle because it looks like a nipple so the cover on this one is plastic to make it lighter and closer to the simple lines I am looking for in our decor.